Lorem Ipsum is simply dummy text of the printing and typesetting industry. Lorem Ipsum has been the industry’s standard dummy text ever since the 1500s, when an unknown printer took a galley of type and scrambled it to make a type specimen book. It has survived not only five centuries, but also the leap into electronic typesetting, remaining essentially unchanged. It was popularised in the 1960s with the release of Letraset sheets containing Lorem Ipsum passages, and more recently with desktop publishing software like Aldus PageMaker including versions of Lorem Ipsum.
Lorem Ipsum is simply dummy text of the printing and typesetting industry. Lorem Ipsum has been the industry’s standard dummy text ever since the 1500s, when an unknown printer took a galley of type and scrambled it to make a type specimen book. It has survived not only five centuries, but also
Lorem Ipsum is simply dummy text of the printing and typesetting industry. Lorem Ipsum has been the industry’s standard dummy text ever since the 1500s, when an unknown printer took a galley of type and scrambled it to make a type specimen book. It has survived not only five centuries, but also the leap into electronic typesetting, remaining essentially
Mike Bryan
Lorem Ipsum is simply dummy text of the printing and typesetting industry. Lorem Ipsum has been the industry’s standard dummy text ever since the 1500s, when an unknown printer took a galley of type.
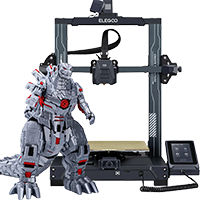
It also known as additive manufacturing, has a rich history that dates back several decades. Here’s a brief overview of the key milestones in the history of 3D printing, along with some images to illustrate its evolution:
Charles W. Hull
1960s
Invention of Stereolithography (SLA):
The concept of this printers began with the invention of stereolithography by Charles W. Hull in 1983. He later co-founded 3D Systems, a pioneering 3D printing company.
1980s
Fused Deposition Modeling (FDM) Patented:
Scott Crump patented Fused Deposition Modeling in the late 1980s, which laid the foundation for the development of desktop printers.
Scott Crump
1990s
3D Printing Industry Emerges:
During the 1990s, several 3D printer technologies and companies emerged, including selective laser sintering (SLS) and the formation of Stratasys.
2000s
Rise of Desktop Printers :
The 2000s saw the development of more accessible desktop printers, making the technology available to a wider audience.
2010s
Expanding Applications:
3D printing began to revolutionize various industries, including aerospace, healthcare, and automotive. Customized prosthetics, dental implants, and aerospace components were being printed.
2020s
Advancements Continue:
The 2020s have witnessed ongoing advancements in printers’ materials, speed, and precision, expanding its applications even further.
Future
Printing in Space and More:
The future of these printers holds promises for applications in space exploration, construction, and personalized medicine.
These images and milestones provide a glimpse into the history and evolution of its technology. It has come a long way since its inception and continues to shape industries and innovation across the globe.
In this tutorial we want to learn how we can add Application in Intune (for windows)? To add an app in Microsoft Intune, you can follow these general steps:
Sign into the Microsoft Endpoint Manager admin center (https://endpoint.microsoft.com) using your administrator account.
Navigate to “Apps” from the left-hand menu.
Click on “Add” to start the process of adding a new app.
Select the app type you want to add. Intune supports several types of apps, including “Managed Google Play app,” “iOS/iPadOS app,” “Android app,” “Windows app (Win32),” “Windows app (store),” and more. Choose the appropriate app type based on your requirements.
Configure the app settings based on the selected app type. The settings may vary depending on the platform and app type. Fill in the required information such as app name, description, publisher, version, installation requirements, etc. Some app types may require additional configuration, such as app package upload or linking to the app store.
Specify the deployment settings, including the targeted user or device groups, installation or assignment options, and any additional settings specific to the app type. These settings determine how the app will be deployed to the managed devices.
Review the settings and make any necessary adjustments.
Click on “Add” or “Save” to add the app to Intune.
Once the app is added, it will be available for deployment to the targeted devices or users based on the settings you configured. Users will then be able to install or access the app through the Intune Company Portal or the managed app store on their devices.
Please note that the specific steps and options may vary slightly depending on the version of Microsoft Intune and the app type you are adding.
To check the DNS records of a domain using PowerShell, you can use the Resolve-DnsName cmdlet. Here’s how you can do it:
Open PowerShell:
Launch PowerShell by searching for “PowerShell” in the Start menu
or by pressing Win + X and selecting “Windows PowerShell”
open “Windows PowerShell (Admin)”.
Run the command: In the PowerShell window, run the following command:
Powershell code:
Resolve-DnsName -Name example.com
Replace “example.com” with the actual domain you want to check. This command will query the DNS records for the specified domain.
View the results:
The command will display the DNS records associated with the domain.
The output will include information like the record type, record name, TTL (Time to Live), and the corresponding IP address or other data.
Here’s an example of the output you might see:
Name Type TTL Section IPAddress
—- —- — ——- ———
A 3600 Answer 192.0.2.123
MX 3600 Answer 10 mail.example.com
NS 86400 Answer ns1.example-dns.com
NS 86400 Answer ns2.example-dns.com
This output indicates that the domain “example.com” has an A record pointing to the IP address 192.0.2.123, an MX record specifying the mail server as “mail.example.com,” and two NS records specifying the authoritative name servers as “ns1.example-dns.com” and “ns2.example-dns.com.”
By using the Resolve-DnsName cmdlet with the appropriate domain name, you can obtain the DNS records for any domain.
If you want to see our learning about this topic, you can click here
یک گروه دینامیک نوع خاصی از گروه است که با یک قانون یا معیار به جای لیست ایستا از اعضا تعریف می شود. گروههای پویا میتوانند برای مدیریت دسترسی به منابع بر اساس ویژگیهای کاربر، مانند بخش، عنوان شغل یا مکان مفید باشند. به عنوان مثال، می توانید یک گروه پویا برای همه کاربران در بخش “بازاریابی” ایجاد کنید و سپس به آن گروه دسترسی به منابع مرتبط با بازاریابی را بدهید
سرویس مدیریت هویت و دسترسی مبتنی بر ابر مایکروسافت است. این به سازمانها اجازه میدهد تا هویت کاربران و دسترسی به منابع را در برنامههای مختلف مبتنی بر ابر و درون محل مدیریت کنند.
:برای ایجاد یک گروه پویا در اکتیودایرکتوری ، می توانید مراحل زیر را دنبال کنید
به پورتال بروید و با حساب مدیر خود وارد شوید
به سرویس اکتیو دایرکتوری بروید
روی “گروه ها” و سپس “گروه جدید” کلیک کنید
“گروه پویا” را به عنوان نوع گروه انتخاب کنید
یک نام و توضیحات به گروه بدهید
قاعده یا معیارهایی را تعریف کنید که عضویت گروه را تعیین می کند
میتوانید از بین ویژگیهای مختلفی مانند بخش، عنوان شغل یا مکان انتخاب کنید و مقادیری را که باید گنجانده شوند را مشخص کنید
تنظیمات گروه را بررسی و تایید کنید و سپس روی “ایجاد” کلیک کنید تا گروه ایجاد شود
هنگامی که یک گروه پویا ایجاد کردید، می توانید از آن برای مدیریت دسترسی به منابع در اکتیودایرکتوری یا سایر برنامه هایی که از احراز هویت اکتیودایرکتوری پشتیبانی می کنند استفاده کنید. همچنین می توانید کاربران را به صورت دستی از گروه اضافه یا حذف کنید یا قانون عضویت گروه را تغییر دهید تا عضویت به صورت پویا تنظیم شود
اکنون با ما همراه باشید تا ویدئو جلسه اول را ازکانال یوتوب ما ببینیم
برای مشاهده تمام آموزش ها میتوانید اینجا کلیک کنید
")
")